Steps that I take to install WSL with Ubuntu, and set up a dev environment to work with Docker, correct permissions and a few other tweaks, on Windows 10. I’ll show the commands to run with explanations.
You can also go straight to the automation scripts.
Enable WSL
If Windows Subsystem for Linux isn’t already set up, run this from a Powershell (admin) prompt.
Enable-WindowsOptionalFeature -Online -FeatureName Microsoft-Windows-Subsystem-LinuxYou will need to reboot after this.
Get the Ubuntu 18.04 image
You can install Ubuntu 18.04 from the Microsoft Store.
You can also just do it via Powershell (admin); download the .appx directly and install it.
New-Item -ItemType Directory -Force -Path C:\Temp
Invoke-WebRequest -Uri "https://aka.ms/wsl-ubuntu-1804" -OutFile "C:\Temp\UBU1804.appx" -UseBasicParsing
Add-AppxPackage -Path "C:\Temp\UBU1804.appx"Configure Ubuntu
Run the first time install. This creates a root user, needed in the next step, and not your own user yet.
ubuntu1804.exe install --rootVerify that the install worked:
> wsl --list
Windows Subsystem for Linux Distributions:
Ubuntu-18.04 (Default)
Set /c/ as the mount point
Set /c/ as the mount point, instead of the default /mnt/c/ - this is needed to work with Docker Desktop for volume mounting.
Also, set a permission mask so that WSL can invoke applications in Windows.
ubuntu1804.exe run "echo '[automount]' > /etc/wsl.conf"
ubuntu1804.exe run "echo 'root = /' >> /etc/wsl.conf"
ubuntu1804.exe run "echo 'options = \""metadata,umask=22,fmask=11,uid=1000,gid=1000\""' >> /etc/wsl.conf"
Create your user
Now create a user, in this example the username is mendhak, just set it to what you want.
You will be prompted to set a password too.
The user will also be configured to run sudo commands without a password prompt.
ubuntu1804.exe run adduser mendhak --gecos "First,Last,RoomNumber,WorkPhone,HomePhone" --disabled-password
ubuntu1804.exe run usermod -aG sudo mendhak
ubuntu1804.exe run "echo 'mendhak ALL=(ALL) NOPASSWD: ALL' >> /etc/sudoers"
ubuntu1804.exe run passwd mendhak
ubuntu1804.exe config --default-user mendhak
Verify that the user has been created properly:
> ubuntu1804.exe run whoami
mendhak
Open MS Terminal
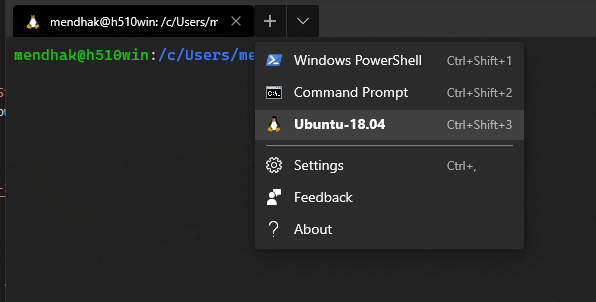
At this point if you open Microsoft Terminal, the Ubuntu 18.04 distro should be recognized and appear in the list of shells.
Choose Ubuntu. The user should already be set to mendhak and the path should already be set to /c/Users/....
Install some dependencies
Basic updates, and adding ~/.local/bin to the path:
sudo apt-get -y update
sudo apt-get -y upgrade
mkdir -p ~/.local/bin
source ~/.profile
Packages that will be needed for development:
sudo apt-get install -y unzip git figlet jq screenfetch \
    apt-transport-https ca-certificates curl software-properties-common \
    python3 python3-pip build-essential libssl-dev libffi-dev python-dev
Install Docker Desktop for Windows
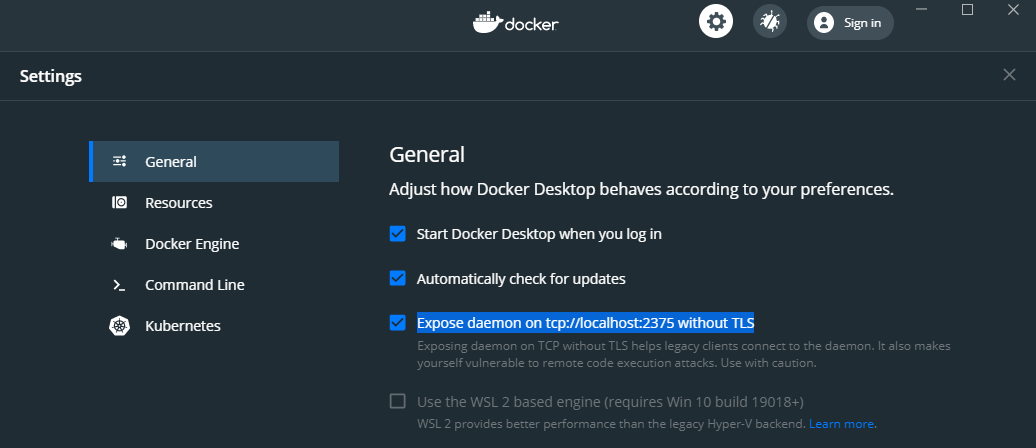
Over in Windows 10, install Docker Desktop. The installer should configure HyperV for you as well.
After installation, be sure to go to Docker Desktop’s settings, and choose to Expose daemon on tcp://localhost:2375 without TLS
It’s also possible to automate the installation of Docker Desktop from Powershell:
Start-BitsTransfer -Source "https://download.docker.com/win/stable/Docker%20Desktop%20Installer.exe" -Destination "C:\Temp\docker-desktop-installer.exe"
C:\Temp\docker-desktop-installer.exe install --quiet
You can even enable the option to expose the daemon by directly modifying Docker’s settings file.
$dockerpath = "$env:APPDATA\Docker\settings.json"
$settings = Get-Content $dockerpath | ConvertFrom-Json
$settings.exposeDockerAPIOnTCP2375 = $true
$settings | ConvertTo-Json | Set-Content $dockerpath
Then restart Docker Desktop.
Install docker and docker-compose
Continuing in WSL, install the Docker client first, and add your user to the docker group. Additionally, use an environment variable to point the Docker client at the Windows host.
curl -fsSL https://download.docker.com/linux/ubuntu/gpg | sudo -E apt-key add -

sudo add-apt-repository \
   "deb [arch=amd64] https://download.docker.com/linux/ubuntu \
   $(lsb_release -cs) \
   stable"
sudo apt-get -y update
sudo apt-get install -y docker-ce
sudo usermod -aG docker $USER

echo "export DOCKER_HOST=tcp://localhost:2375" >> ~/.bashrc && source ~/.bashrc
Verify that docker can talk to the Windows host
docker info
docker run hello-world
Now install docker-compose
pip3 install --user docker-composeVerify that the install worked:
docker-compose versionConfigure GPG
GPG needs to be told what kind of terminal this is, to allow prompting for passphrase.
echo 'export GPG_TTY=$(tty)' >> ~/.bashrcCreate SSH directory
Create your SSH directory with the right permissions.
mkdir -p ~/.ssh/
chmod 700 ~/.ssh
Configure umask
Due to a umask bug in WSL1, files can appear with incorrect permissions. To fix it:
echo '[[ "$(umask)" == '\''0000'\'' ]] && umask 0022' >> ~/.bashrcTo test this,
umask
source ~/.bashrc
umask
The first output should be 0000, and the second should be 0022
Starting over
In case you mess up, just delete the distribution.
wsl --terminate Ubuntu-18.04
wsl --unregister Ubuntu-18.04 Automating the whole thing
It’s also possible to automate the entire process - from installing WSL to Ubuntu to configuring the bash environment, and even installing Docker Desktop for Windows.
You will need two scripts, a preparewsl.ps1 and a preparewsl.sh.
Kick off the process by running the Powershell script, which in turn calls the bash script.
powershell -executionpolicy bypass -file .\preparewsl.ps1