When running machine learning workloads that require GPU access, it’s usually necessary to have the CUDA toolkit ready. Although installing CUDA directly on the host is possible, I prefer to keep the host system clean and isolated from major dependencies. This is especially useful when working with libraries such as PyTorch, TensorFlow, and others that can end up in weird states of conflict with each other, especially when some libraries expect specific versions of CUDA.
The most straightforward way to achieve this isolation is to use Docker with GPU support in devcontainers. This allows for a reproducible environment that can easily be shared and version controlled.
Installing the NVIDIA Container Toolkit
Docker is pretty simple to install, I usually use the convenience script from their site.
Now by default, Docker doesn’t have GPU access. The way to enable this is to install the NVIDIA Container Toolkit, following the instructions here. For me on Linux, the steps were:
# Configure the package repository
curl -fsSL https://nvidia.github.io/libnvidia-container/gpgkey | sudo gpg --dearmor -o /usr/share/keyrings/nvidia-container-toolkit-keyring.gpg \
&& curl -s -L https://nvidia.github.io/libnvidia-container/stable/deb/nvidia-container-toolkit.list | \
sed 's#deb https://#deb [signed-by=/usr/share/keyrings/nvidia-container-toolkit-keyring.gpg] https://#g' | \
sudo tee /etc/apt/sources.list.d/nvidia-container-toolkit.list
# Install the runtime packages
sudo apt-get update
export NVIDIA_CONTAINER_TOOLKIT_VERSION=1.18.1-1
sudo apt-get install -y \
nvidia-container-toolkit=${NVIDIA_CONTAINER_TOOLKIT_VERSION} \
nvidia-container-toolkit-base=${NVIDIA_CONTAINER_TOOLKIT_VERSION} \
libnvidia-container-tools=${NVIDIA_CONTAINER_TOOLKIT_VERSION} \
libnvidia-container1=${NVIDIA_CONTAINER_TOOLKIT_VERSION}
# Configure Docker to use the Nvidia runtime
sudo nvidia-ctk runtime configure --runtime=docker
sudo systemctl restart docker
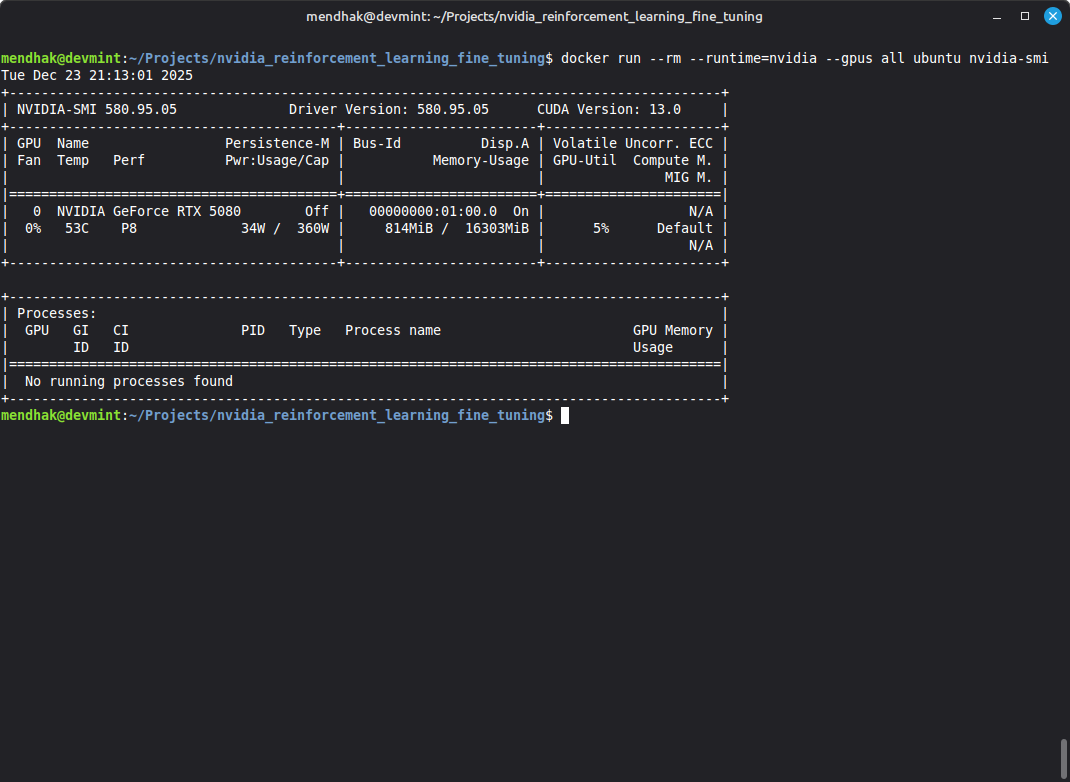
# Finally run a quick test
docker run --rm --runtime=nvidia --gpus all ubuntu nvidia-smiDocker is now able to access the GPU on the host, tested using the nvidia-smi command:
Setting up the devcontainer
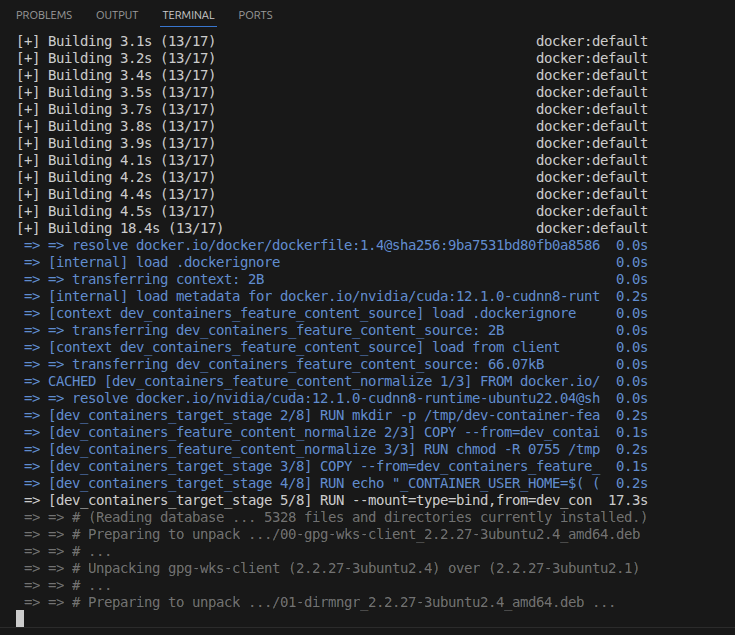
Devcontainers are a way of defining a development environment using Docker containers, and specifying settings, extensions, and other bits of configuration. Compatible IDEs, including VS Code, know how to read the devcontainer configuration and set up the environment. This usually involves downloading or building the Docker image, starting the container with the right settings, installing features, and connecting the IDE to the container.
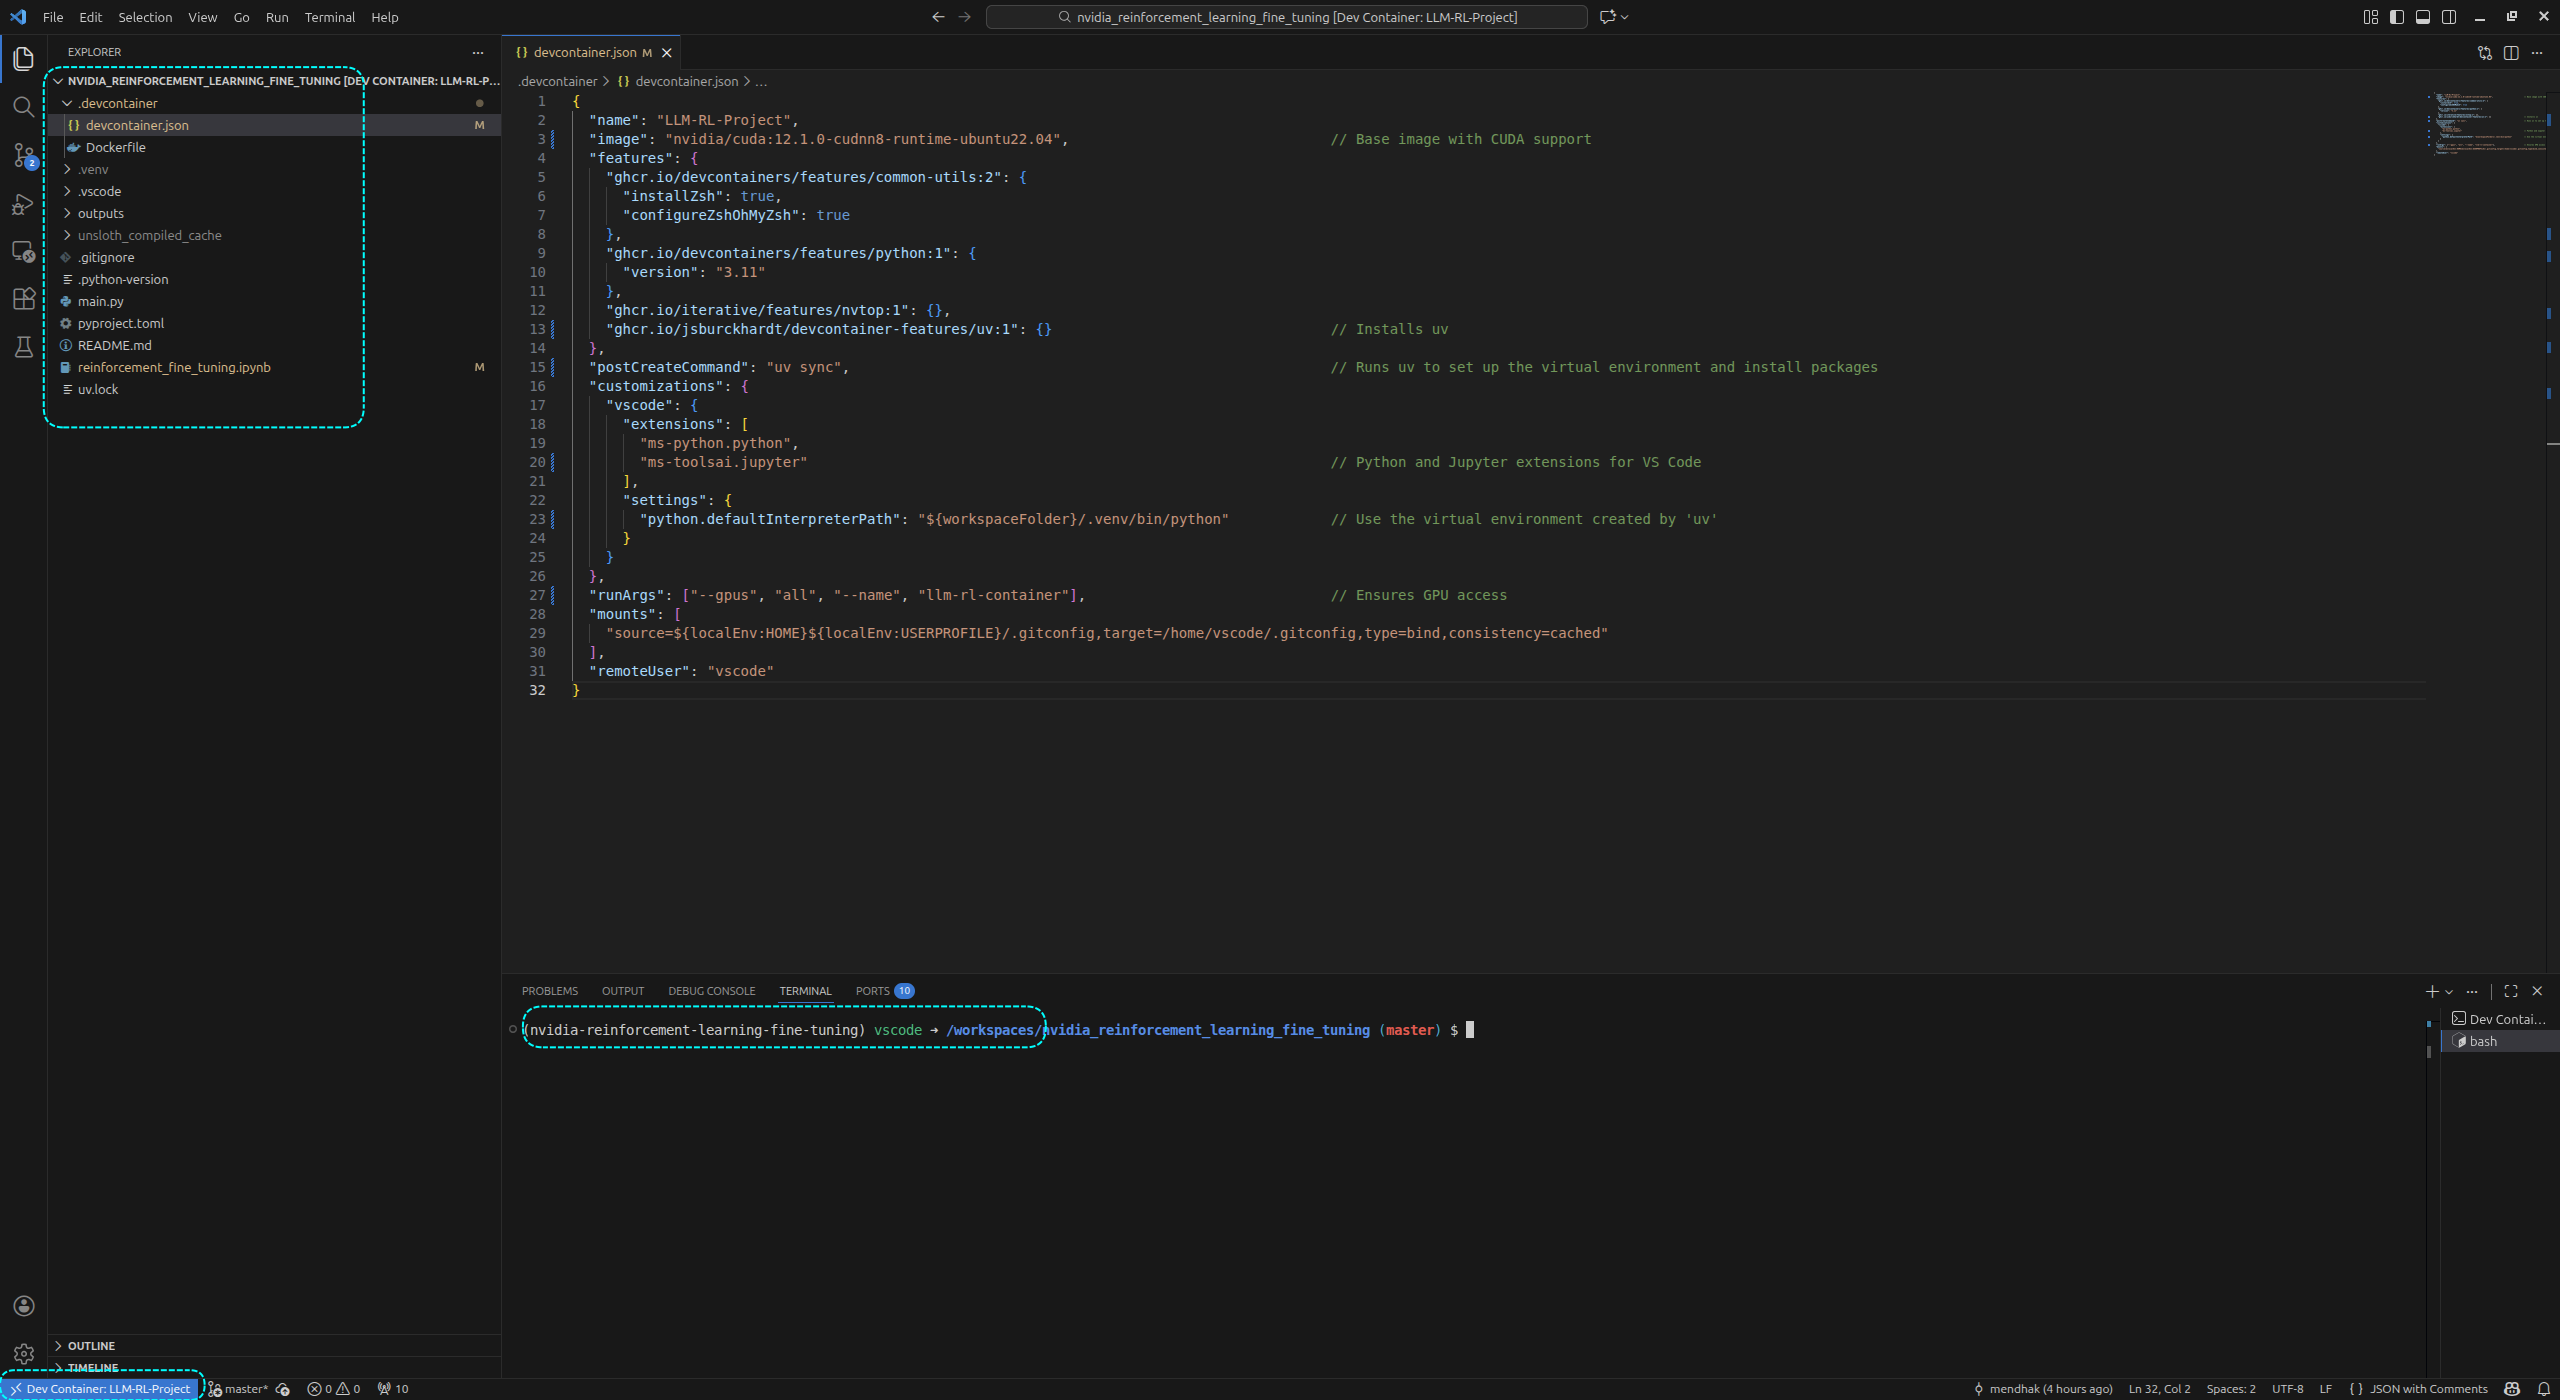
Here is a devcontainer configuration which uses a base image from NVIDIA with CUDA support.
The features section includes Python 3.11 and uv for virtual environment management. The postCreateCommand runs uv sync just as you would in a normal repository.
Further along, the Python and Jupyter extensions are installed in VSCode, and the Python interpreter is set to the virtual environment created by uv.
Finally, the runArgs section ensures that the container has access to all GPUs on the host.
{
  "name": "LLM-RL-Project",
  "image": "nvidia/cuda:12.1.0-cudnn8-runtime-ubuntu22.04", // Base image with CUDA support
  "features": {
    "ghcr.io/devcontainers/features/common-utils:2": {
      "installZsh": true,
      "configureZshOhMyZsh": true
    },
    "ghcr.io/devcontainers/features/python:1": {
      "version": "3.11"
    },
    "ghcr.io/iterative/features/nvtop:1": {},
    "ghcr.io/jsburckhardt/devcontainer-features/uv:1": {} // Installs uv
  },
  "postCreateCommand": "uv sync", // Runs uv to set up the virtual environment and install packages
  "customizations": {
    "vscode": {
      "extensions": [
        "ms-python.python",
        "ms-toolsai.jupyter" // Python and Jupyter extensions for VS Code
      ],
      "settings": {
        "python.defaultInterpreterPath": "${workspaceFolder}/.venv/bin/python" // Use the virtual environment created by 'uv'
      }
    }
  },
  "runArgs": ["--gpus", "all", "--name", "llm-rl-container"], // Ensures GPU access
  "mounts": [
    // gitconfig for the user's git settings
    "source=${localEnv:HOME}${localEnv:USERPROFILE}/.gitconfig,target=/home/vscode/.gitconfig,type=bind,consistency=cached"
  ],
  "remoteUser": "vscode"
}
Just placing this file at .devcontainer/devcontainer.json in the project folder is enough for VS Code to pick it up and prompt to reopen the folder in the container, including performing the setup steps.
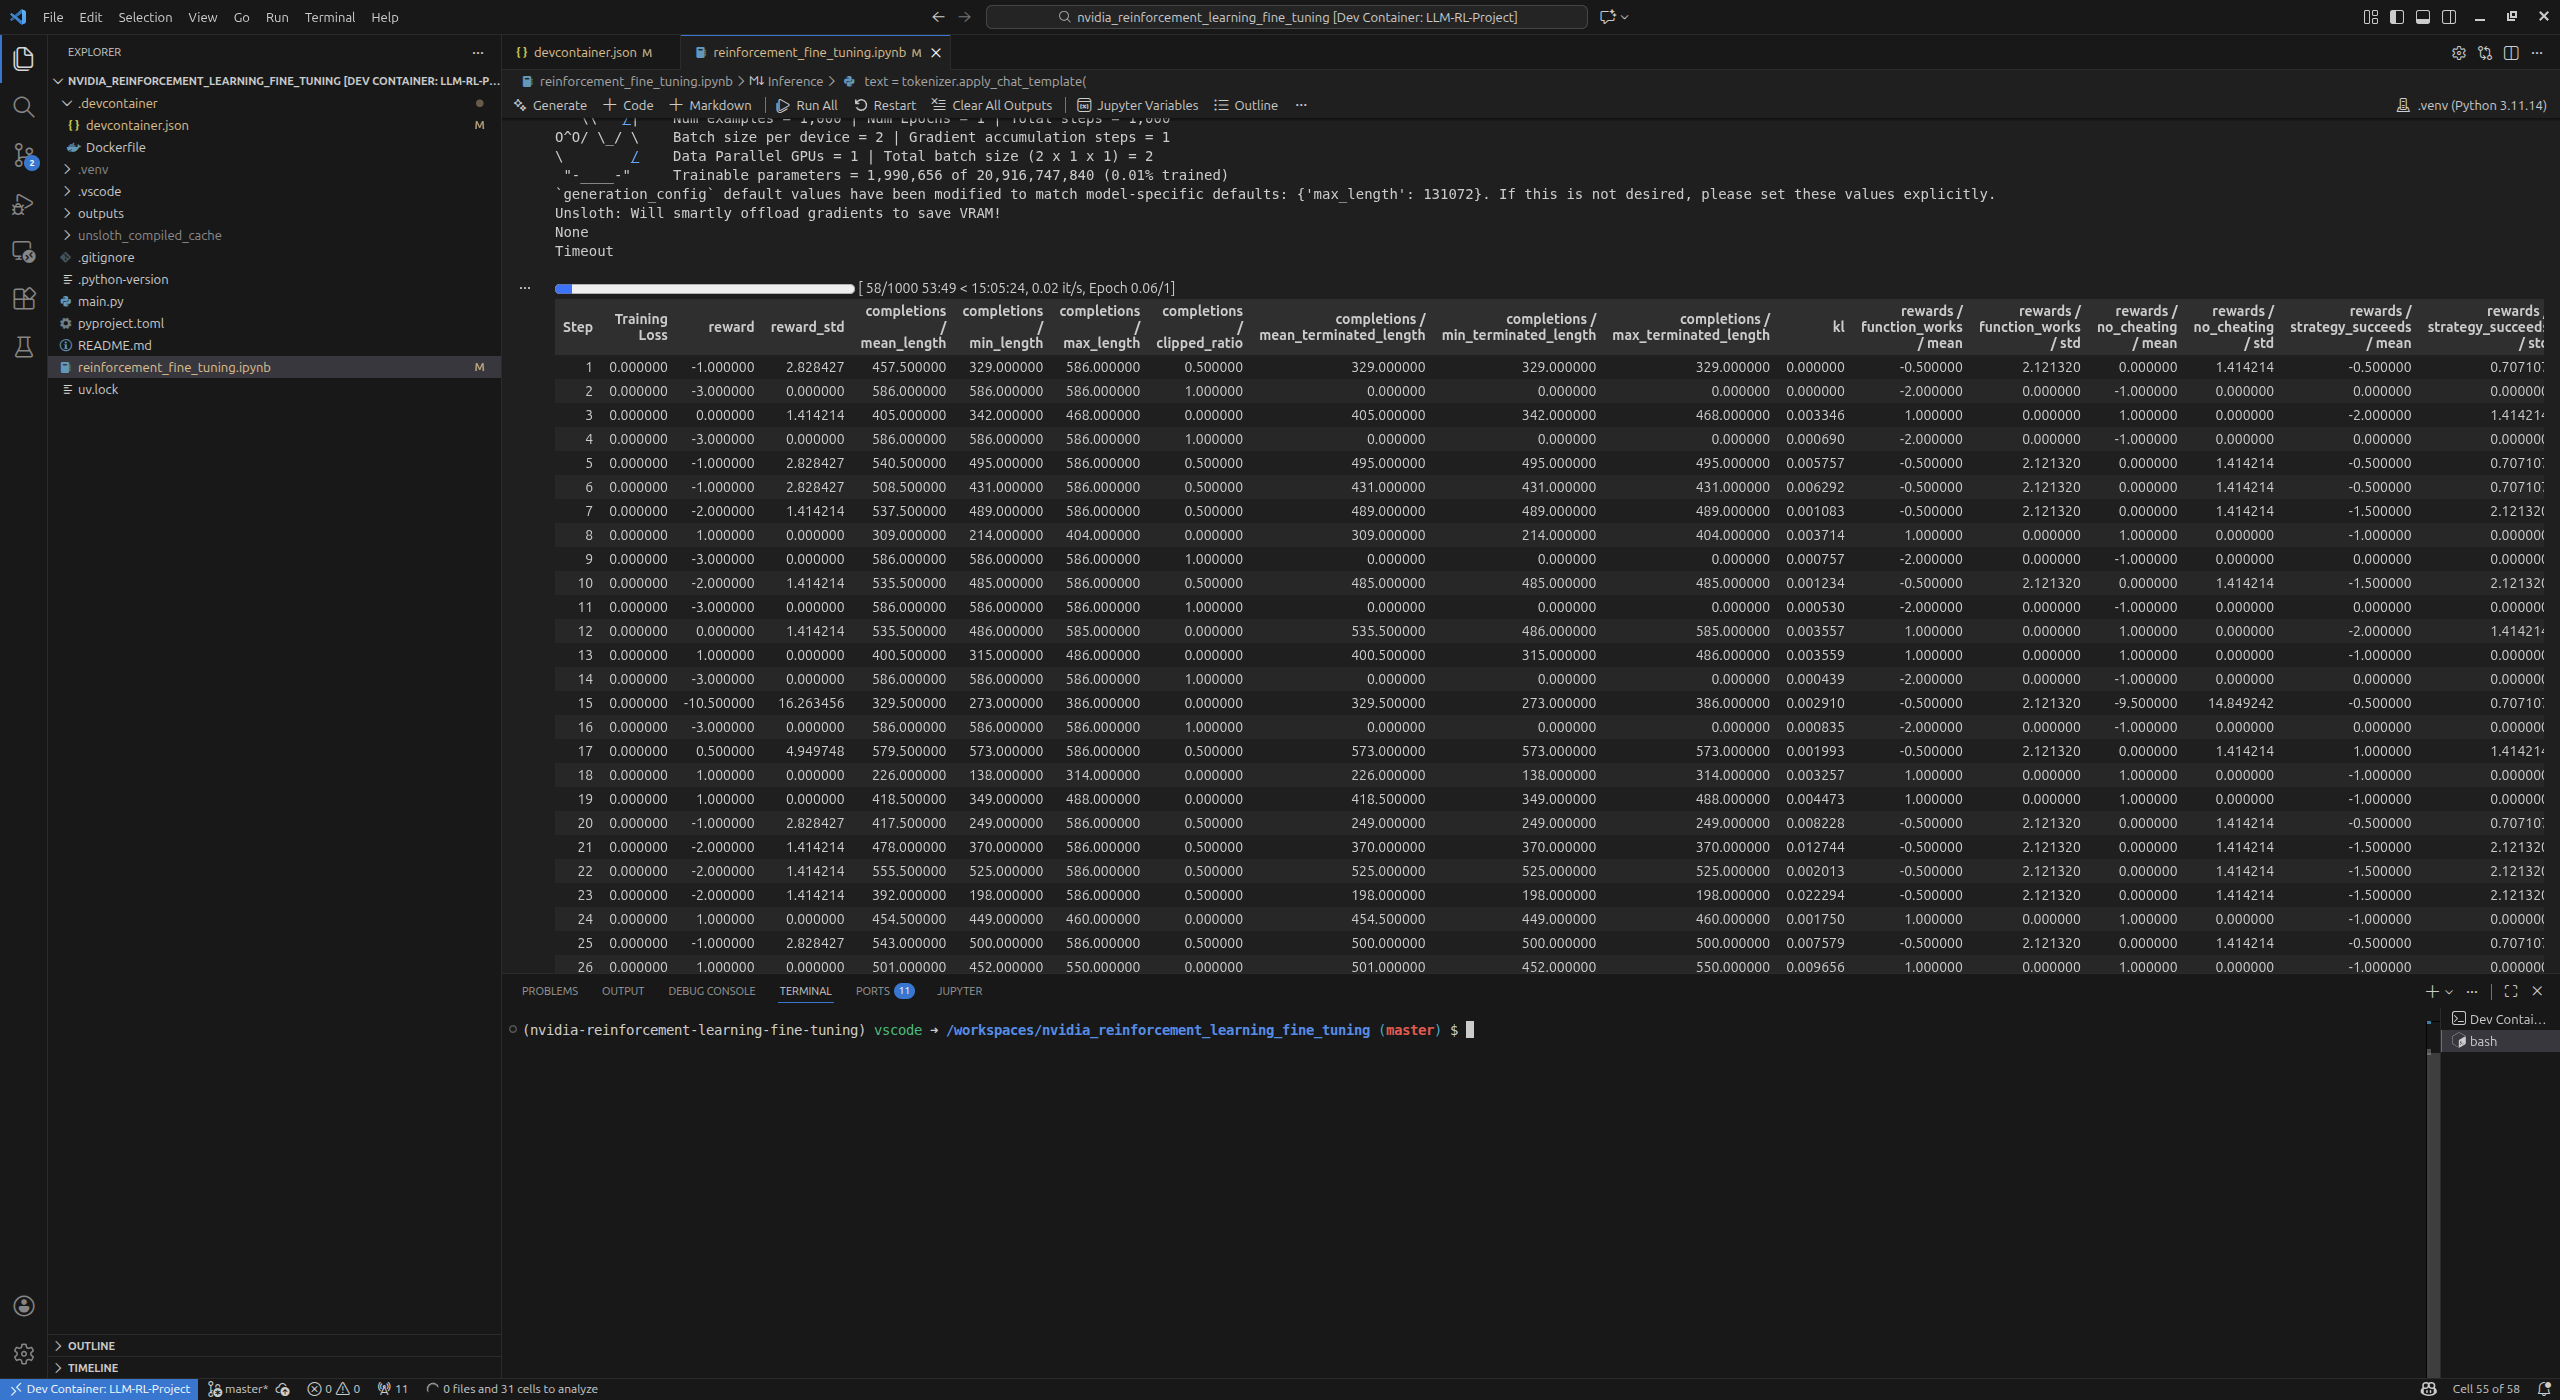
The first run takes a while. Once complete, VS Code is connected to the container and the environment looks very familiar. The terminal shows that the virtual environment is active, and the path starts with /workspaces/ which indicates that it’s running inside the container.
The project files are all there, and the SSH agent is forwarded so that git operations work as expected.
It isn’t necessary to use a ready-made base image, it’s also possible to point at Dockerfiles that do their own custom setup. There are many ways to customize the devcontainer environment. It isn’t necessary to use the uv feature above either, that can also be a Dockerfile step if preferred.
Machine all the learnings
And now the fun part, which is running those notebooks. The example that spurred me was a tutorial from Unsloth on applying reinforcement learning with a reward function to gpt-oss to teach it how to play the 2048 game. They provide a notebook that does all the steps, so I just saved it as .ipynb and opened it in VS Code in the devcontainer.
Sample repo
I have pushed a sample repository demonstrating this setup to GitHub. It should be enough to just clone the repo and open it in VS Code to get started. But make sure that the NVIDIA Container Toolkit is installed on the host first, otherwise the container won’t have access to the GPU.