KeePassXC is an alternative to KeePass 2; an interesting feature is that it has SSH agent support built in, rather than supplied via a plugin. It can be used to serve SSH keys to WSL1, which is useful when remoting on to servers, or using Git over SSH.
Some benefits of putting your SSH key into your Keepass are that you can have a strong password on the private key but don’t need to type it out each time, and that you don’t need to save your keys on disk - you can let KeePassXC manage the storage, unlocking and serving of the keys for you.
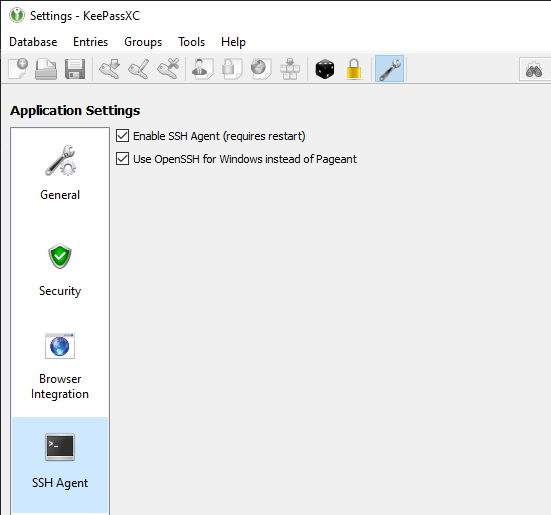
Set up KeePassXC
Open up KeePassXC’s settings, and choose to Enable SSH Agent and also Use OpenSSH for Windows instead of Pageant.
The second option requires the OpenSSH service in Windows to already be running, you will get an error message if it isn’t.
Store an SSH key
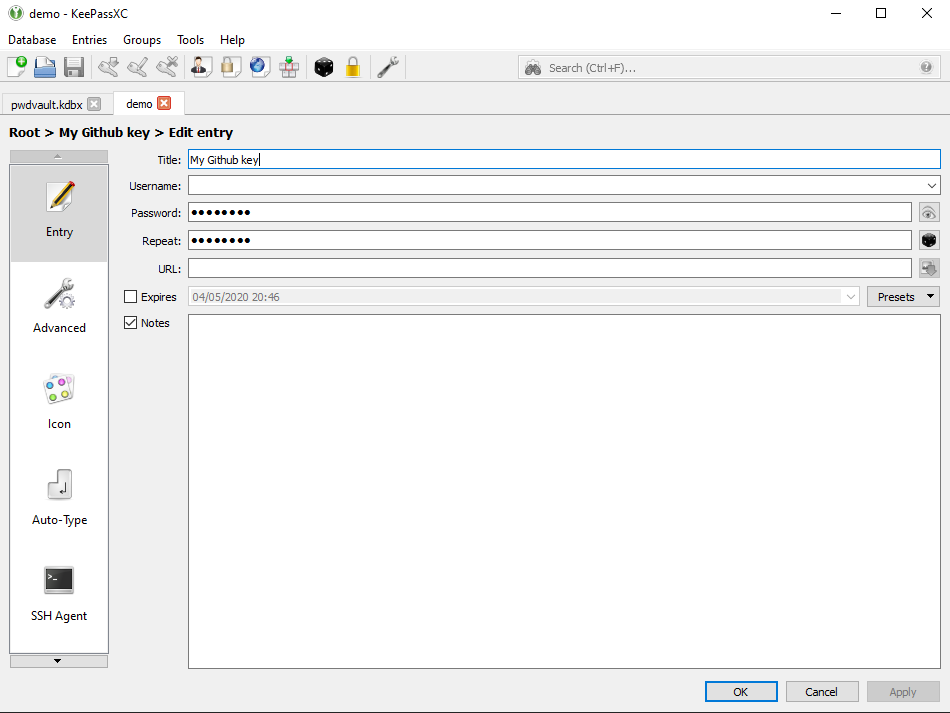
.kdbx and KeeAgent entries, and you should already see your SSH keys loaded.Create a new entry in your database, give it some name, and in the password field, put the passphrase for your SSH key.
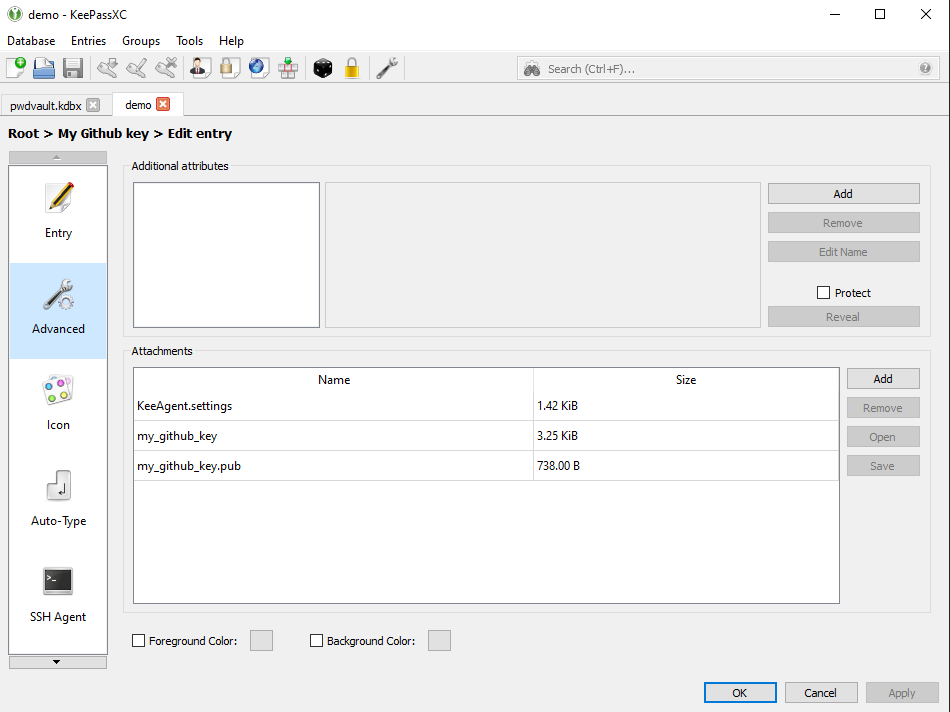
In the advanced section, attach your public and private key, then hit OK, then save the entry. You need to save so that the SSH Agent can read your key in the next step.
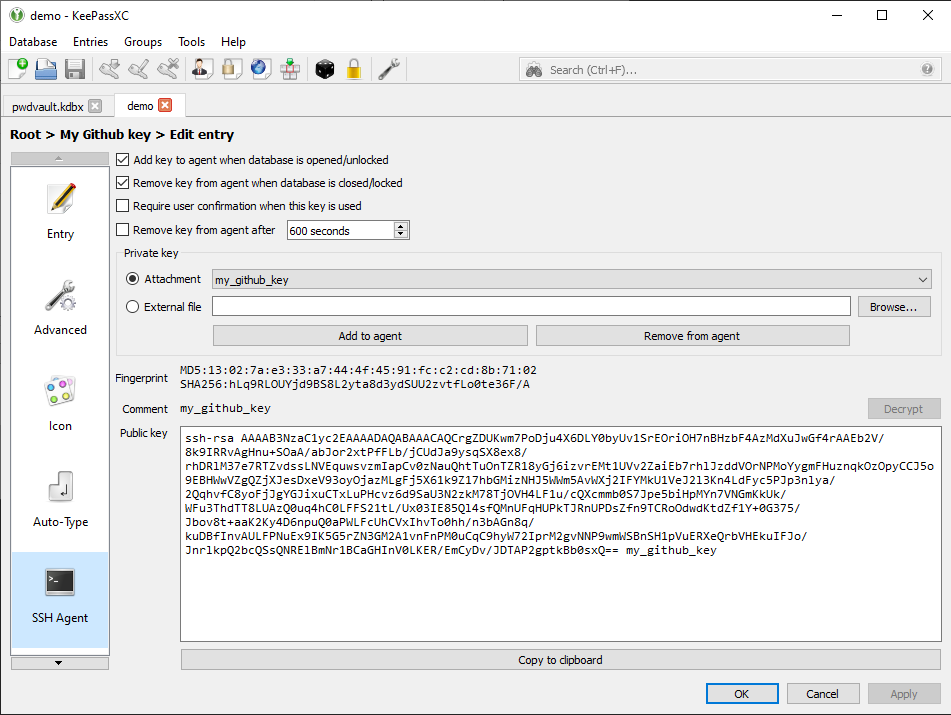
Now reopen the entry, then go to the SSH Agent section, under Private key, pick the file you attached earlier. The rest of the section should get filled out with details about your key. Once again hit OK and save; KeePassXC is now serving those keys to the Windows SSH agent.
Get WSL SSH Agent
wsl-ssh-agent is a helper tool that interfaces with Windows’ own SSH Agent service.
Extract the zip in Windows, not in WSL. You can place it anywhere. If you’re trying to stay portable, it can be placed in a synched directory near KeepassXC and your KDBX, for example your Google Drive or Dropbox folders.
Tell WSL to use it
You will need to tell WSL to talk to wsl-ssh-agent, so that it can talk to Windows SSH Agent, so that it can fetch your keys from KeePassXC.
In your ~/.bashrc, add the following lines. Adjust the path to point at wherever you have placed the exe. Ensure that C:\Temp exists, or change the path for the .sock file as well.
export SSH_AUTH_SOCK=/mnt/c/temp/ssh-agent.sock

(/mnt/c/Users/mendhak/Google\ Drive/Documents/keys/wsl-ssh-agent/wsl-ssh-agent-gui.exe -socket "C:\Temp\ssh-agent.sock" & disown)/c/, be sure to reflect that in the path above.
Reload WSL, and this should call out to the wsl-ssh-agent.
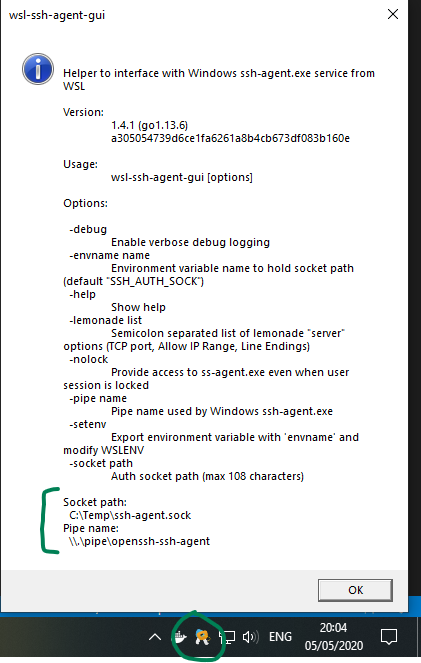
Look at your system tray area for a pair-of-keys icon that appears. If you click About, you can also see the path to your .sock at the bottom of the help dialog.
Test it
Assuming you’ve already added your public key to Github, do a quick test.
$ ssh -T [email protected]
Hi mendhak! You've successfully authenticated, but GitHub does not provide shell access.